
Products
Fast, Reliable, Everywhere
Solutions
Efficient, Innovative EV Charging Solutions.

As the EVs (Electrical Vehicles) landscape keeps on evolving. The EV chargers serve as the link between the EV users and Efficient charging.
The Level 2 chargers are highly desirable among different chargers as they are compatible with most vehicles. Using these chargers, the vehicles can replenish their charging needs.
Setting up the Level 2 EV charger requires special attention from the owner. You need to cope with effective installation without getting insights on the essentials. You cannot make your Level 2 EV charger run or operate effectively.
No worries, as this article aims to provide insights into everything about the Level 2 Charger setup. Apart from this, you will also get useful information on the Level 2 EV charger power requirement. Sounds great? Let’s dive right into the article!
Another name, the Level 2 Chargers, refers to the workplace and public chargers. A Level 2 EV charger refers to a charger that uses the AC input. You can connect this charger to a 240 V input source.
These chargers can support a power output of 3kW up to 20kW. The vehicles can get up to 80 percent using these chargers on 3 to 5 hours of charging. The charging rate of the Level 2 Charger is much higher than the Level 1 Charger. On average, with the level 2 chargers, you can travel up to 32 miles.
| Sr. No. | Level of Charging | Power Output (kW) | Charge Time (hours) | Travel Range per Hour (miles) | Supported Connectors |
| 1 | 2 | 3 to 22 | 2 to 13 | 10 to 75 | 1) J177S2) GB/T (AC)3) Mennekes |
There are specific power requirements when it comes to the Level 2 chargers. You need to get insights into the power requirements of the Leve 2 Charger. This will later help you in proper level 2 charger installation:
Voltage
The Level 2 charger usually operates at the standard voltage of 240V. This is higher than what the Level 1 charger operates, 120V.
Ampere
There are multiple ampere options exist when it comes to the Level 2 chargers. These includes the 16A, 32A, 40A, and 50A. The amperes directly impact the speed with which you can perceive the charging.
Get insights on the charging time as per specific power output in the table below:
| Sr. No, | Level 2 Charger (Output Power) | Charging Time (Hours) |
| 1 | 3 kW | 13.3 |
| 2 | 7 kW | 5.7 |
| 3 | 11 kW | 3.6 |
| 4 | 19.2 kW | 2.1 |
| 5 | 22 kW | 1.8 |
Power Output Calculation
Calculate the power output to determine when you need to charge your vehicle. For this purpose, you need to multiply the ampere by the voltage. Consider the following example to clear your concept:
If the current in ampere of the Level 2 Charger is 32 Amp, then the power output will be 32Amp ×
240 V = 7.68 kW. This means you need 3.6 to 5.7 hours to charge your vehicle fully.
Assess Circuit Capacity
The charger output decides the circuit ampere it needs. For instance, take this for understanding a Level 2 Charger that results in 32-amp of output. It requires a circuit of 40-amp. In contrast, the 48-amp charger requires a 60-amp circuit for effective operation. You need to ensure that your home/workplace circuit meets the charging needs of the charger.
Please note that if you overload the circuit, then this will result in overheating, short circuit, and even tripping. This will put security and safety in question because the Level 2 charger operates on a higher load. You may or may not need to upgrade the panel.
Make sure the existing panel can support the functioning of the 2-pole breakers. This will help you in times of load shedding. Also, it will exactly support the amperage of the Level 2 Charger.
Cross-Check Phase Compatibility
You can install the level 2 charger on any phase you want. The key ones include the three-phase and single-phase. You can find the two-phase setting in households or workplaces. On the other hand, the three phases exist in the commercial or industrial setting.
But this is not true for all level 2 EV chargers. So make sure to check what phase your charger supports appropriately. Considering these points will help you charge in a safe and sound environment.
If you don’t know how to Match Chargers with Specific EV Models, you can click here to read, I hope it will be helpful to you.
There are many steps you need to follow when it comes to the installation of the Level 2 EV chargers. Some of the key steps in this regard are as follows:
Assessing The Installation Location
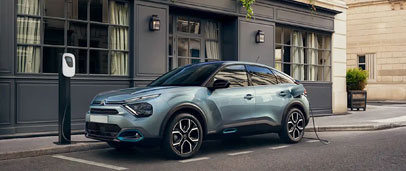
First of all, when setting up the Level 2 EV charger, you need to determine the location. Ensure the location is close to the power source and offers convenient accessibility to the EV owners. Check for the parking convenience for the EV owners.
Find out if the location is close to the city or if it must receive the maximum traffic for maximum visibility. The level 2 chargers are perfect for hotels, parking, and homes. They are highly suitable for overnight charging.
Power Source Assessment
While selecting a location, ensure it copes with the power needed for the Leve 2 charger. Cross-check the volts, amperes, and compatibility of phase.
Selection of the Charger
In the third step, select the specific charger per your power source. Select the charger that offers high-speed charging at the desired voltage. This is because no one has enough time to wait while charging.
Permit Acquisition
It is crucial to acquire the code from the local authorities or regulations to facilitate the installation. This will make you keep working in the long run.
Wiring Setup
When it comes to wire selection, choose the correct gauge. This will help you deal with the higher load and smooth charging. While setting up the wire, ensure it is safe from hurdles and obstacles. This will prevent you from experiencing shocks or accidents.
Installing The Dedicated Circuit
The circuit is the key thing in the EV charging installation. Before installing the circuit, ensure it supports the proper ampere, watts, and volts your charger requires. Apart from this, ensure the circuit has a breaker inside, preventing damage to your charger or vehicle.
Grounding
The grounding refers to the preventive measure that passes the electrical current to the ground in case of short circuits/shocks. You can achieve the grounding by installing the proper devices. This way, you can stay away from electric shocks.
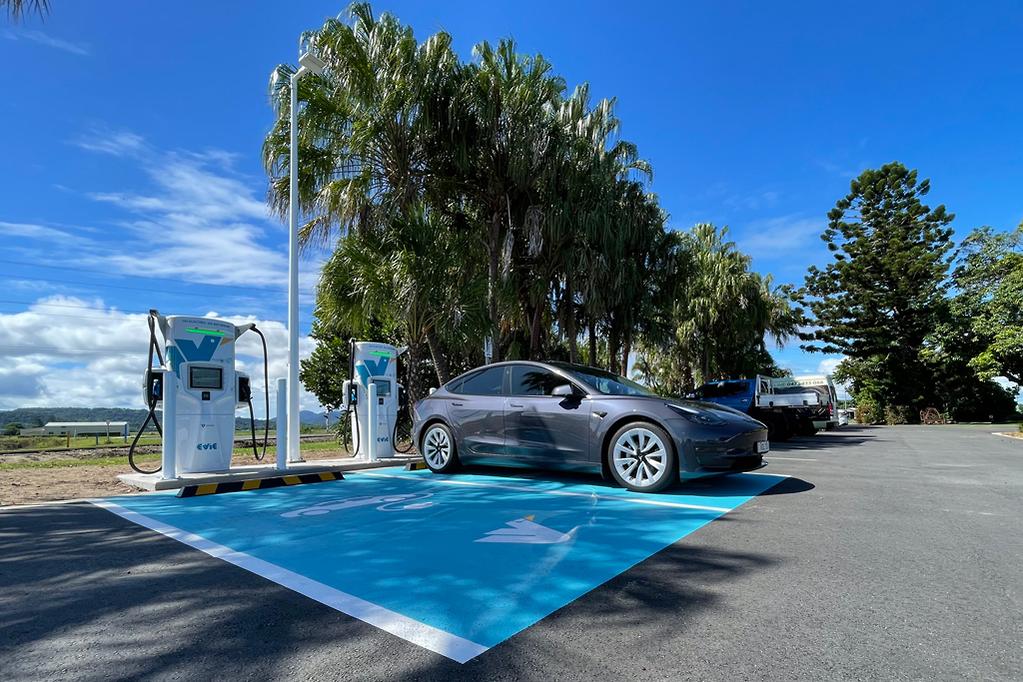
Charger Mounting
There are different types of level 2 chargers depending on the mounting. When installing the charger, assess whether you need to install it on the wall. Or you need to install it on the pedestal. While installing the charger, make sure it is at a height accessible by anyone at a higher convenience.
Charger Connection
In this step, connect the charger to the power source through the dedicated circuit. You can follow the user manual with the charger purchase to do this. Make sure each connection features accuracy and optimum tightness when making the connections.
Power Distribution Unit (Optional)
As the term reflects, the power distribution unit is a system or device. It allocates the current to the devices as per their requirement. This system unit is beneficial when installing multiple level 2 chargers with the same power source. It delivers an optimum energy level at the time of need without damaging the vehicle or charging unit.
Temperature Sensor and Cooling System
Both components are crucial if you want to work with your level 2 charger for longer. The temperature sensor prevents the current from crossing a particular value. It, in turn, eliminates overheating or short-circuiting.
As the temperature rises, the sensor auto-shuts off the power system. The cooling system, on the other hand, cools off the charger. With both of these components at hand, you can increase the life of your level 2 EV charger.
Testing
After installation start the level 2 charger operation. Make sure it is charging the vehicle. Note down the time of charging at different amperages. This way, you can know if your charger is working optimally. Inspect every component of the charger while in operation. Make sure everything is working fine and optimally.
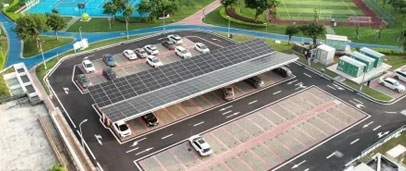
Shading Area Installation (Optional)
The shading area is not a necessity for the level 2 EV charger. If you install multiple chargers, you can install the shading area. This will help you provide shade and protection from sun and rain to the users. You can also protect your level 2 EV charger from these elements. The beam, posts, and shade are the main components of the Level 2 EV charger.
Following the above steps, you can make the right selection for the level 2 EV charger. But also following the above steps allows you to effectively and efficiently set up your charger for operation.
Use this guide to practically install the Level 2 EV charger. Share your thoughts in the comment section after following this guide. If you want to know more about chargers, please follow piwinev charging.
Related Reading:EV Charging Stations: Commercial, Public & Home Solutions
